
Looking for ways to change fonts in your PC? this post will help you – Innovation couldn’t be better in this 21st century. There are many advanced features in Windows 10, one can easily understand how to Install Fonts on Windows 10 and customize your PC accordingly. Although not much has changed from its predecessors, Windows 10 lets you add, delete, and modify fonts in your system. You can even download third-party fonts with Windows 10. The post will teach you changing fonts in quick, easy steps.

How to install fonts on Windows 10 through Microsoft Store?
Time needed: 5 minutes
Steps to Install fonts on Windows 10
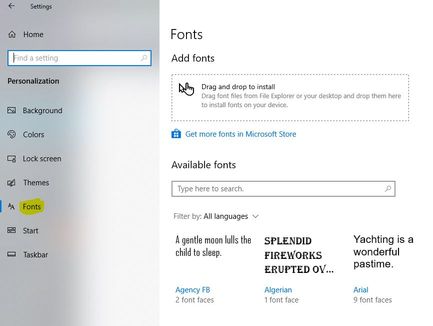
- Open Personalization and then click the Fonts tab.
Right-click and tap personalize to enter Personalization option in Windows 10, now on the left menu click on Fonts.

- Download Fonts from Microsoft Store
You’ll see a link above, ‘Get more fonts,’ from the Microsoft Store. Click that, and then select the font of your choice. Alternatively, you can also manually download and install the font from the website of your choice.

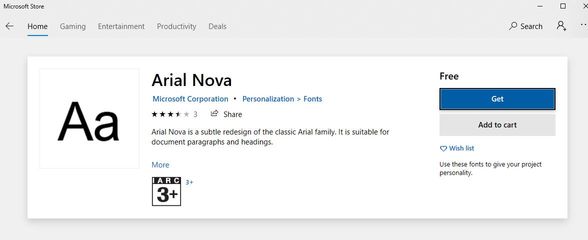
- Click on GET to download font
Once you found the right font, click on Get (blue button) to download and use it,


Downloading fonts from Google Fonts
- Go to fonts.google.com
- Pick the font you want to download

- Once the font has been downloaded, it may or may not be bundled into a zip file. If zipped, right-click the tab, select ‘Remove Everything,’ and then follow the instructions to position the font in the folder of your choosing.
- Now, Open the Control Panel, switch to Appearance and Personalization, and select Fonts in the main window. Drag and drop the fonts file there or follow the other step below
- Once your font library is loaded, drag your new font from the destination location in File Explorer to the fonts window. A small progress bar will appear as it is being installed. Once completed, the font is ready to be used.

If any of the regular fonts included with Windows 10 are absent, you will have to setup Windows again. The setup helps to recover lost or changed files. Rebooting your Windows 10 will help to reset your font collection, and you can once again personalize them from the Control Panel.
The following fonts are included with Windows and are mounted on every computer: Courier New (TrueType, including Bold, Italic, and Bold Italic) Arial (TrueType, including Bold, Italic, and Bold Italic variations), Times New Roman (TrueType, including Bold, Italic, and other variations), Symbol (TrueType), Wingdings (TrueType), MS Serif, MS Sans Serif.
Alert: If you are downloading Windows again, you may disable the programs and hardware drives that you installed since the last time Windows was updated on your computer. If you need more information about the files you might lose, you might want to contact Help on the Microsoft website.
Sometimes the default fonts supported in the new version of Windows 10 just don’t cut it for you. You might need something a bit more exciting for your forthcoming PowerPoint presentation or graphic design project. Technology is advancing, imagination drives creativity, and feasting the eyes is way more important than pleasing with content. People today derive great pleasures and comfort from working with specific fonts. Have fun installing new and exciting fonts on Windows 10!