
Over the years, we have become entirely dominant in the digital space when it comes to storing our media like photos, videos, etc., In addition to storing your photos and videos, you could also share them with the world through social media apps like Instagram, TikTok, etc., So, when it comes to posting on the social media you can share them in various formats and ideas.

One way to share them is by using layouts where you can have two or more photos in a single form and share them as a single image. This was popularized by Instagram and even other apps. So, how can put two photos together or even more? In this article, we will dive into all the possible ways to do this in Google Photos, Online, photoshop, or even the iPhone.
How to Put Two Photos Side By Side in Google Photos?
First, let’s see how to do this in the Google Photos app. You can install the app from the Play store or from the App Store depending on what type of smartphone you use.
See Also: How to Identify Fonts Used In Any Photo Or Image
- Open the Google Photos app on your smartphone. I’m using Google Pixel and if you have a different phone, it shouldn’t be difficult to follow.

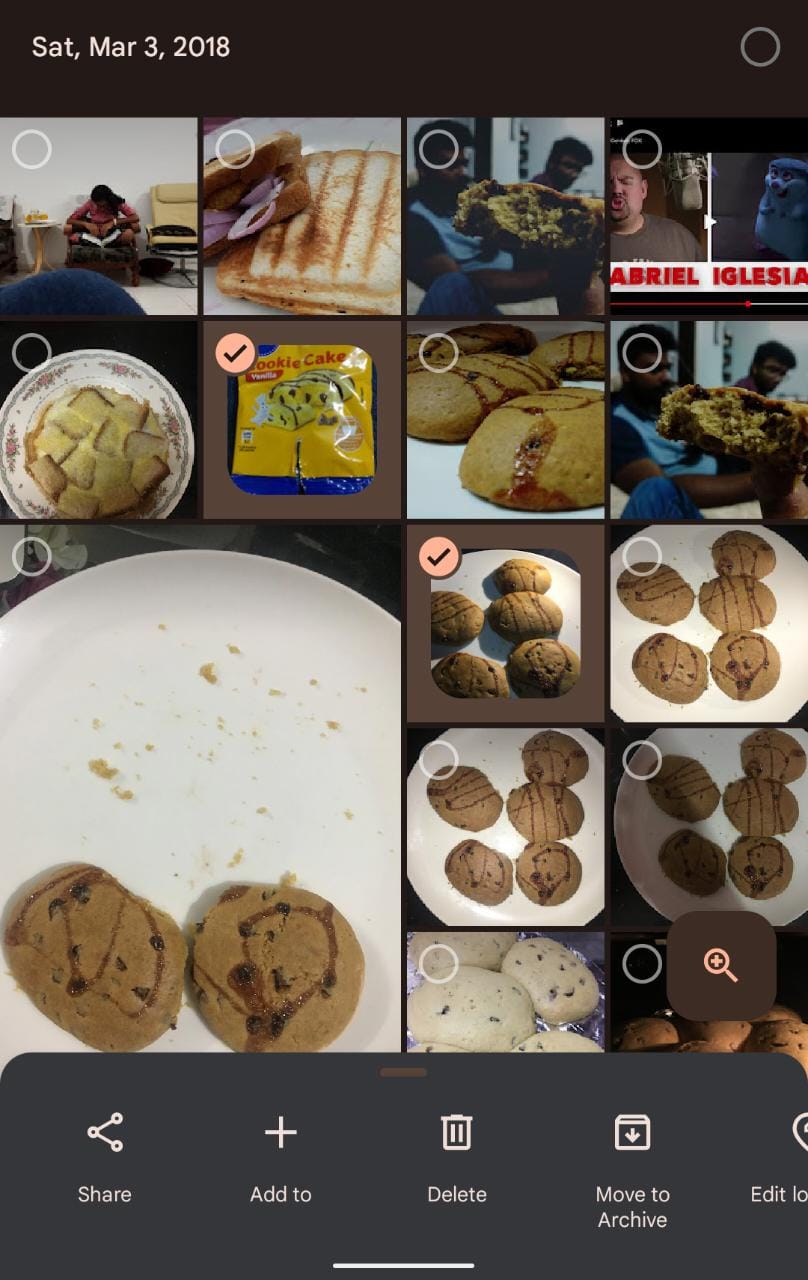
- Once you are in the Google Photos app, navigate to the photos which you would want to put side by side. Select those two photos as I have done below and then look for the Add to + option at the bottom.

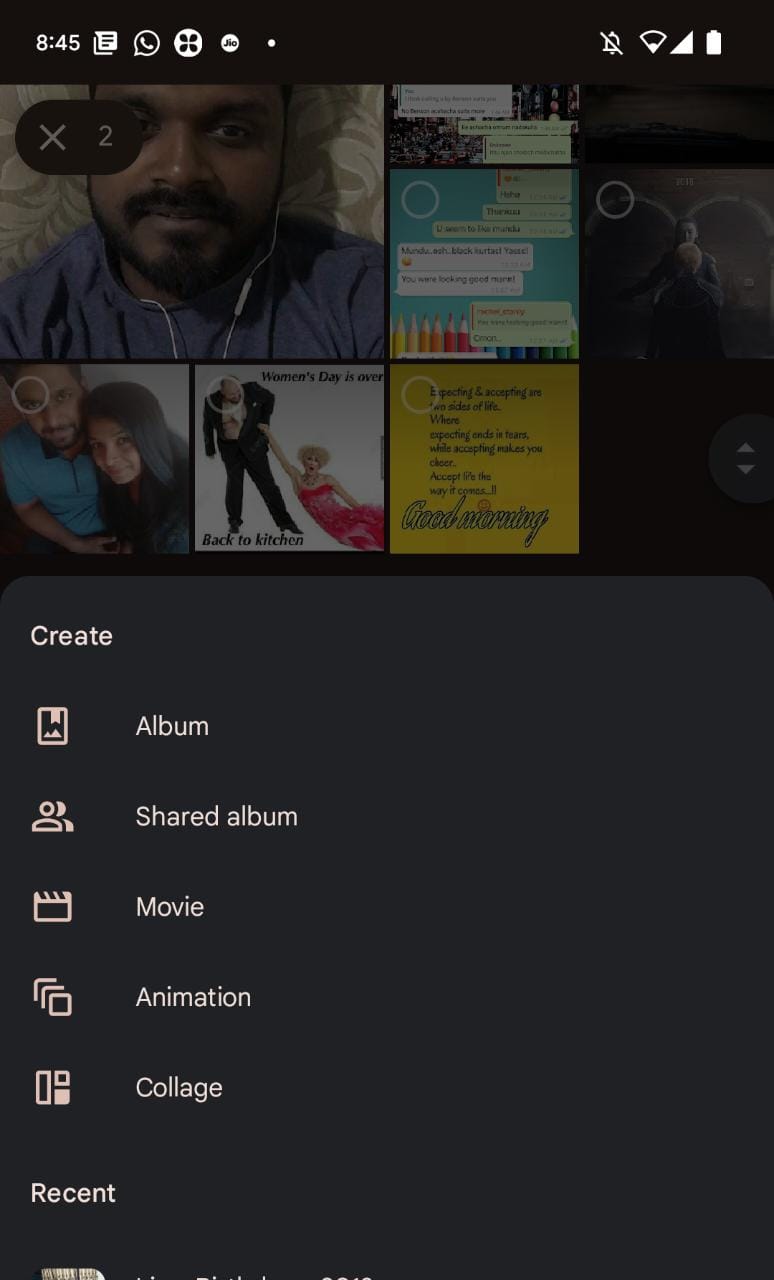
- Select Add to option and look for the popup that appears.
- In the popup choose the Collage option as you can see below. This will put both images side by side as a collage structure.

- As you can see now you have two images side by side from your selection. This collage is prepared based on the number of photos you have selected so make sure you select only two which would get you these collages.

- After that tap on the Share option, and it will get you the popup with all the possible sharing options like social media, messaging apps, etc.,
- This would let you share the collage anywhere you want to share it or even save it if you would like that.


This is how you can put two images side by side using Google Photos. If you are using different smartphones, the steps might look a little different but they shouldn’t be difficult to follow.
How to Put Two Photos Side By Side Online?
There are so many ways to do this online but I personally like Adobe Express Free Online Photo Collage Maker tool. Its super easy and well designed and you can get your work done easily in a few steps.
See Also: How to remove background from Photos in your iPhone
- Open Adobe Express in a browser using this link. Once you are there, click on the Design your free collage now button.

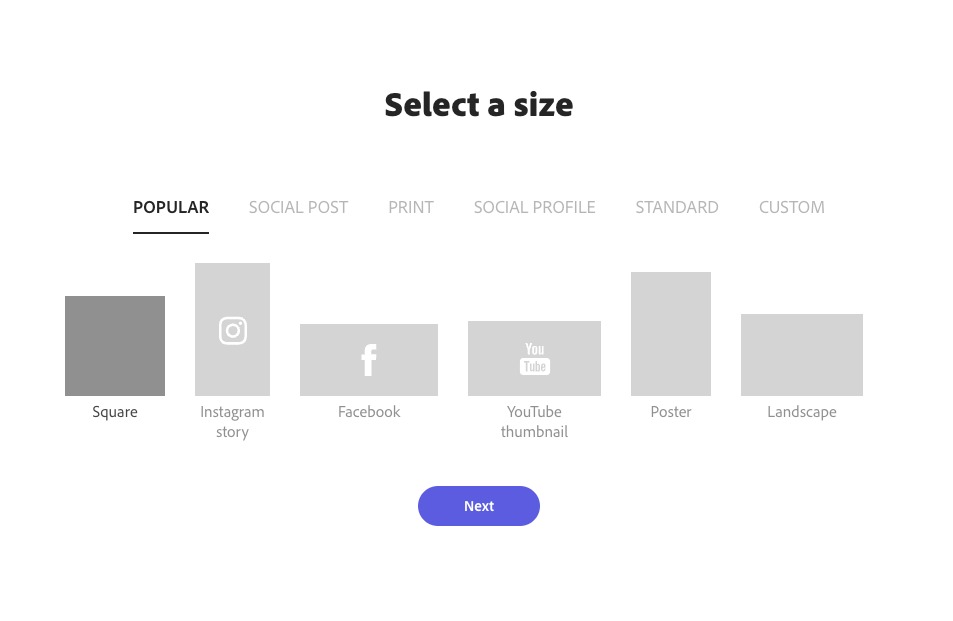
- Now you are at the screen where you have to choose the size of the collage. There are so many options like Square, Instagram Story, and thumbnail, etc., There are options based on what type of image you want to create like the social post, print, social profile, etc., Choose the one that works for you.

- Once you have selected the size, then you need to log in with any of your social accounts like Google, Facebook, Apple, email, or even with Apple ID. This is the only hassle but the tool is free so its not that bad.

- Once you have successfully logged in, you will be taken to the Choose Photos section. You can either click on the Upload button or even search from Adobe stock images.

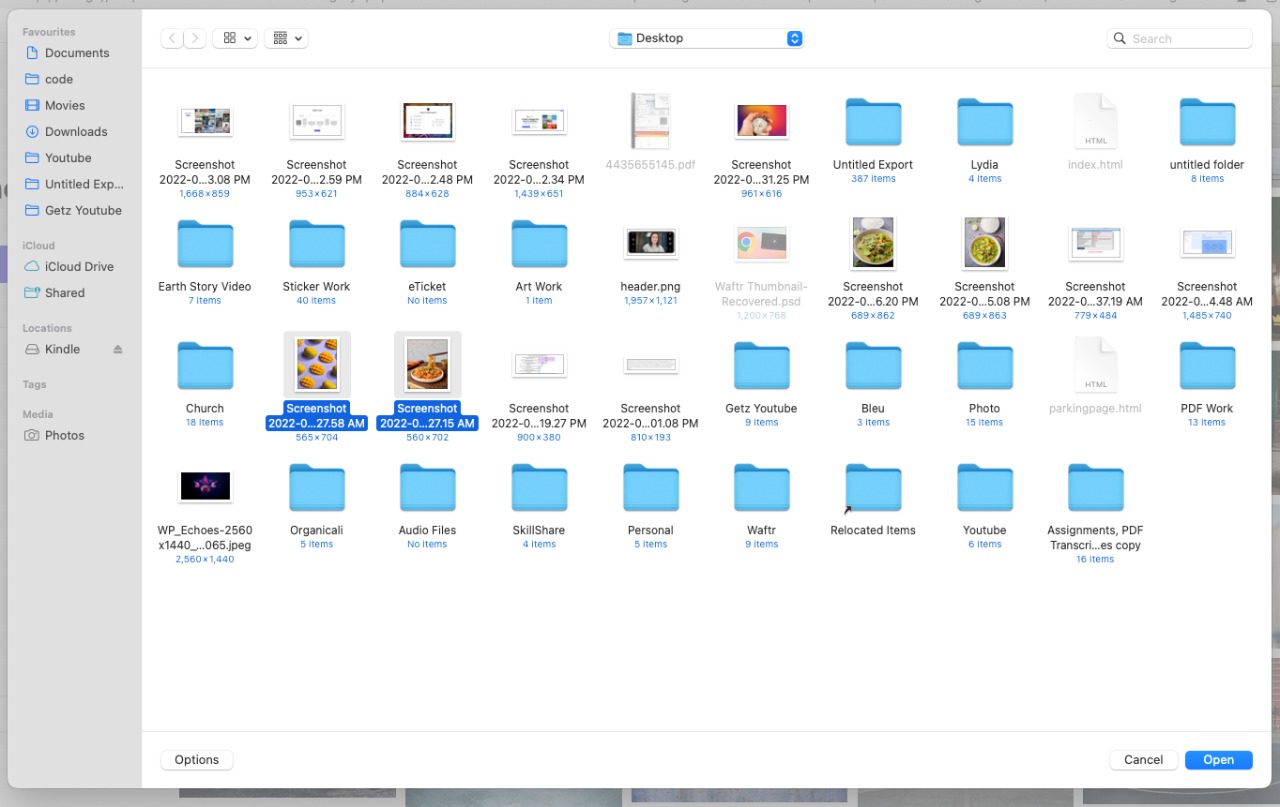
- You can also directly drag and drop photos from the file browser directly into the page.

- As soon as you add images, the page will look something like this. Since we are trying to do two photos side by side, choose only two photos.

- Once you select the two photos, those two will be automatically added to the collage as you can see. You can also add text effects or GIFs too to the image if you want. You can choose them from the list on the left side or even try other sections like photos, backgrounds, logos, design assets, etc.,

- You can also rearrange the photos and position them in the way you want them to be as I have done in the image below. I have moved the left image on the left for the chopped sticks to be visible.

- Adobe Express lets you both share and download the photos side by side that you created. Click on the Download button will show the options will where you can choose the download type of the image from PNG, JPG, or PDF. Once you choose, click on Start Download.

- Other than that, Share options have a list of options like Publish, Schedule, Send to Google Drive, etc., If those options are something of interest to you, use them but I’d imagine downloading is mostly what you want.


That’s it. It’s super easy to make collages (two photos side by side) online using this amazing tool called Adobe Express.
How to Put Two Photos Side By Side in Photoshop?
Adobe Photoshop is a great tool to make image edits if you have the time to put some effort into doing it. Photoshop would require you to do all the work by yourself. It’s not a tool like Adobe Express but it will work great.
See Also: 15 Best Photo Editing Apps [2022]
Follow the steps below to put two images side by side in Adobe Photoshop.
- As soon as you open Photoshop, you will see these options on the landing page. Click Create New from those options.

- Now you will be asked to choose the image size as we did in Google Photos and Adobe Express but when it comes to Photoshop, we have a variety of options to customize it. I’m choosing a square image with 500 x 500 pixels since we did the same in the above two examples. You can manually type the width and height on the right side of the window as well. Select Create once you have done that and a new document will be created.

- As you can see, you will get a blank document of square size which is not saved yet. So, please make sure to save it once you have done the changes.

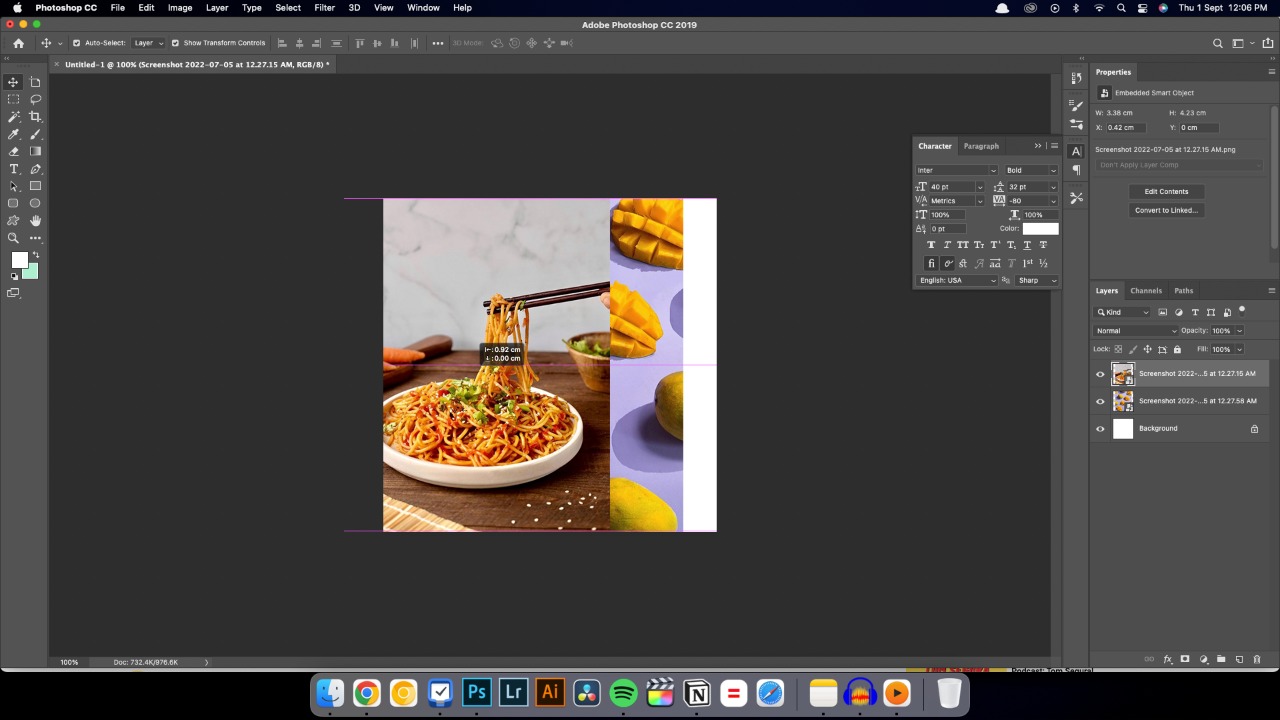
- Drag and drop the two images that need to be put side by side onto the document as you can see below. You can also open it manually if you want but then you need to copy and paste those two images one by one by yourself.

- Now, in the layers panel, you can see three layers. The background white layer and then the two images we dropped onto the document in the previous step.

- You can place the images side by side by using the Move tool or pressing A on the keyboard.
- So, if you need to crop the images at all, then you need to rasterize the image layers because dragging and dropping images onto a document will treat them as smart objects to preserve their image quality. To rasterize right click on the layer in the layers panel and choose Rasterize Layer.

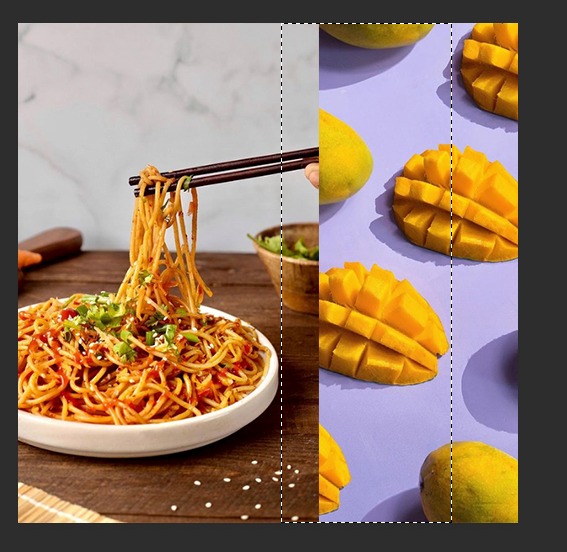
- Once rasterized, you can use the select tool to select areas of the image you need to remove or crop from the photo like below.

- After selecting you can press Delete on the keyboard and the select area in the selected layer will be removed as you can see in the image below.

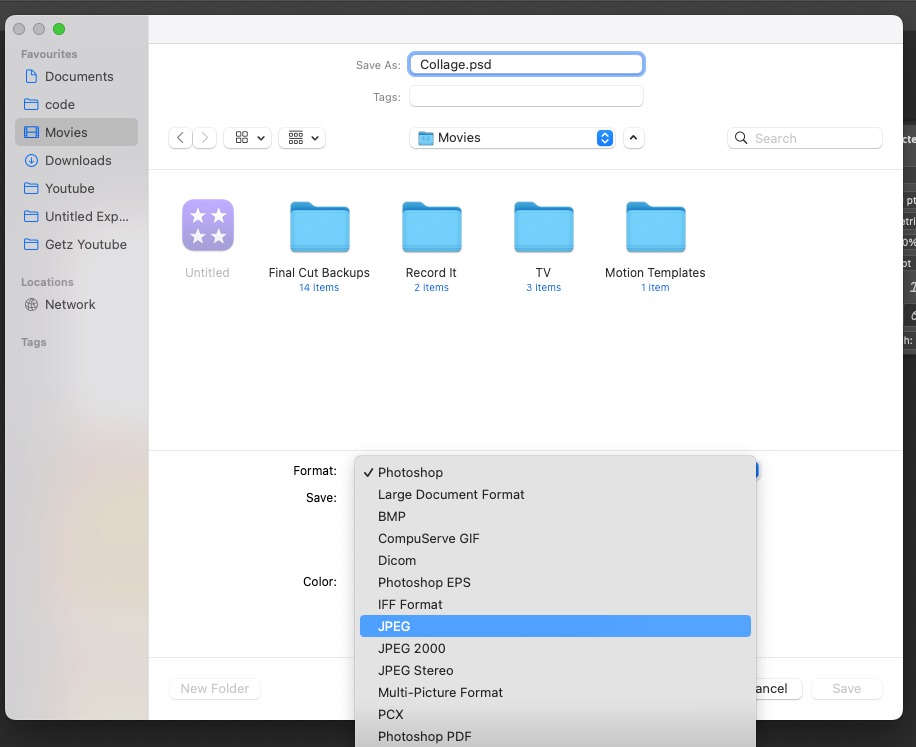
- If you are happy with the final image, then we can move forward to the saving part of the image. Choose File -> Save As or Press Ctrl/Cmd + Shift + S on the keyboard. This will open up the Save Dialog box which will automatically save the photo as a PSD file (PSD file extension). You can choose where you want to store the image. In case if you want to make changes to this in the future, then you might want to keep a PSD copy of the file. If not you can save it as a final image on JPEG or any other noneditable formats.

- To save the final image, choose JPEG from the format type as you can see in the image below.

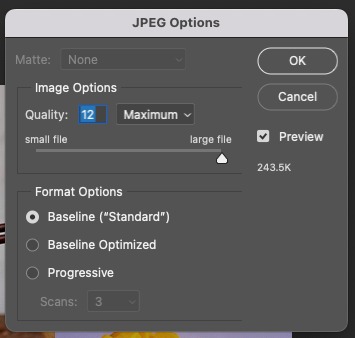
- If you choose to save it as a JPEG, then you will get this dialog box after clicking on the Save button in the previous step. This is where you can choose the quality of the image size. This can be helpful when you have to keep the file size below a certain number. I have used this feature so many times where I had to upload my passport-sized photo under a certain size.


These are all the ways you can actually put two pictures side by side depending on the device you are using the perform this operation. I really hope this was helpful and you were able to do what you were trying to do.
See Also: Top 10 Photo Editing Apps for Windows 11
Also, please note that there are so many other ways like apps, sites, and tools to put two images side by side. You can search for them online and if the ones above don’t work for you, then you can definitely find the ones that would probably work for you.
Do you know any other tools that can be used to do this? Do let us know in the comments below.